What is Windows Efficiency Kit?
Windows Efficiency Kit is a fake antivirus program. It is programmed to make profit by displaying fake alerts, fake security warnings and fake infections.Once it is installed, you could be encountering these scenes:
1) Windows Efficiency Kit is configured to automatically scan your compute after you log in windows. After scanning, it displays a lot of threats which are designed to scare you into believing its scams. When you try to deal with these so-called threats, you are required to purchase its license before you are allowed to do so. (Please feel safe to ignore these fake threats and don’t follow that it states. It aims at making money by scaring you.)
2) To protect itself from being removed, some of your legitimate programs are disabled including your advanced antivirus program. When you try to run your antivirus program or other programs, you will receive a message like these:
Firewall has blocked a program from accessing the Internet
Internet Explorer C:\Program Files\Internet Explorer\iexplore.exe is suspected to have infected your PC. This type of virus intercepts entered data and transmits them to a remote server.
The worse situation is that your antivirus program may be removed by Windows Efficiency Kit as an infection.
3) These are the fake errors you may get after the infiltration of Windows Efficiency Kit:
Error
There's a suspicious software running on your PC. For more details, run a system file check.
Error
Trojan activity detected. System data security is at risk. It is recommended to activate protection and run a fully system scan.
4) Your computer may restart and restart again after Windows Efficiency Kit finishes its fake scanning.
As you can see, Windows Efficiency Kit needs to be removed at once before your computer gets worse. The longer time it stays on your computer, the more malware like browser hijackers or Trojans will be dropped onto your computer since your computer has been hacked.
Efficient Removal Solution Details
Solution 1: Remove Windows Efficiency Kit Manually
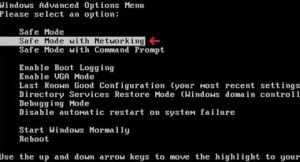
1) Boot your computer into Safe Mode with Networking.To perform this procedure, please restart your computer and keep pressing F8 key until Windows Advanced Options menu shows up, then using arrow key to select “Safe Mode with Networking” from the list and press ENTER to get into that mode.
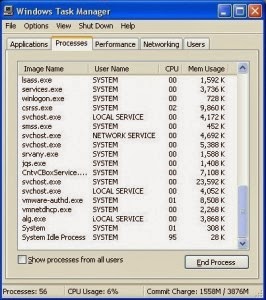
2) Press Ctrl+Alt+Del keys together to pull up Window Task Manager and end suspicious processes:
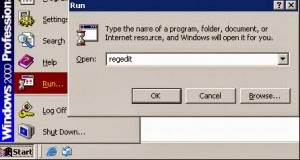
3) Open the Registry Editor, search for and delete these Registry Entries created by Windows Efficiency Kit .
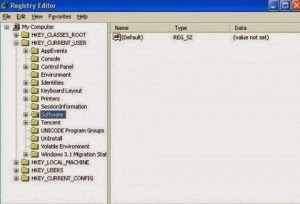
HKEY_LOCAL_MACHINE\SOFTWARE\Microsoft\Windows NT\CurrentVersion\Image File Execution Options\ekrn.exe “Debugger” = ‘svchost.exe’
HKEY_LOCAL_MACHINE\SOFTWARE\Microsoft\Windows NT\CurrentVersion\Image File Execution Options\msascui.exe “Debugger” = ‘svchost.exe’
HKEY_LOCAL_MACHINE\SOFTWARE\Microsoft\Windows\CurrentVersion\Run “3948550101″
HKEY_CURRENT_USER\Software\Microsoft\Windows\CurrentVersion\Run “xas”
4) Check the following directories and remove all these associated files:
%windows%\system32\drivers\Windows Efficiency Kit .sys
%CommonPrograms%\Windows Efficiency Kit .lnk
%DesktopDir%\Windows Efficiency Kit .lnk
%UserProfile%\Start Menu\Windows Efficiency Kit \Uninstall Windows Efficiency Kit
%LocalAppdata %\Windows Efficiency Kit virus\uninstall\Windows Efficiency Kit .lnk
%program files%\NPSWF32.dll
%UserProfile%\Desktop\Windows Efficiency Kit .lnk
5) Disable suspicious startup items. click start menu->type msconfig in the search bar -> open System Configuration Utility -> Disable all possible startup items generated.
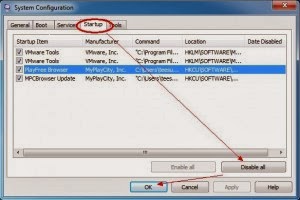
6) Restart your computer to the normal mode and check the effect.
Solution 2: Remove Windows Efficiency Kit automatically (with SpyHunter)
Step A. Download removal tool SpyHunter
1) Click here or the icon below to download SpyHunter automatically.

2) Follow the instructions to install SpyHunter


Step B. Run SpyHunter to block Windows Efficiency Kit
Run SpyHunter and click "Malware Scan" button to scan your computer, after detect this unwanted program, clean up relevant files and entries completely.

Step C. Restart your computer to take effect.

